Introduction: The Call of the Ice and the Burden of Gear
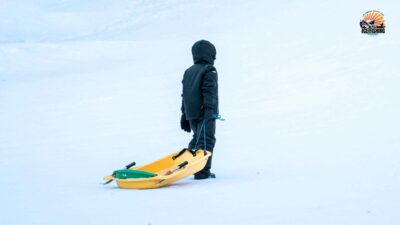
The winter landscape holds a unique allure, especially for those drawn to the quiet solitude and thrilling potential of ice fishing. Crisp air, frozen vistas, and the anticipation of what lies beneath the ice – it’s an experience unlike any other. Yet, reaching that perfect spot often involves a significant challenge: transporting gear. Augers, shelters, heaters, rods, bait, chairs, electronics – the list grows quickly, and hauling it all across snow-covered ice can feel less like a peaceful escape and more like a grueling expedition. Many anglers know the feeling of dread that accompanies a long walk from the parking lot, especially when fresh snow blankets the lake.
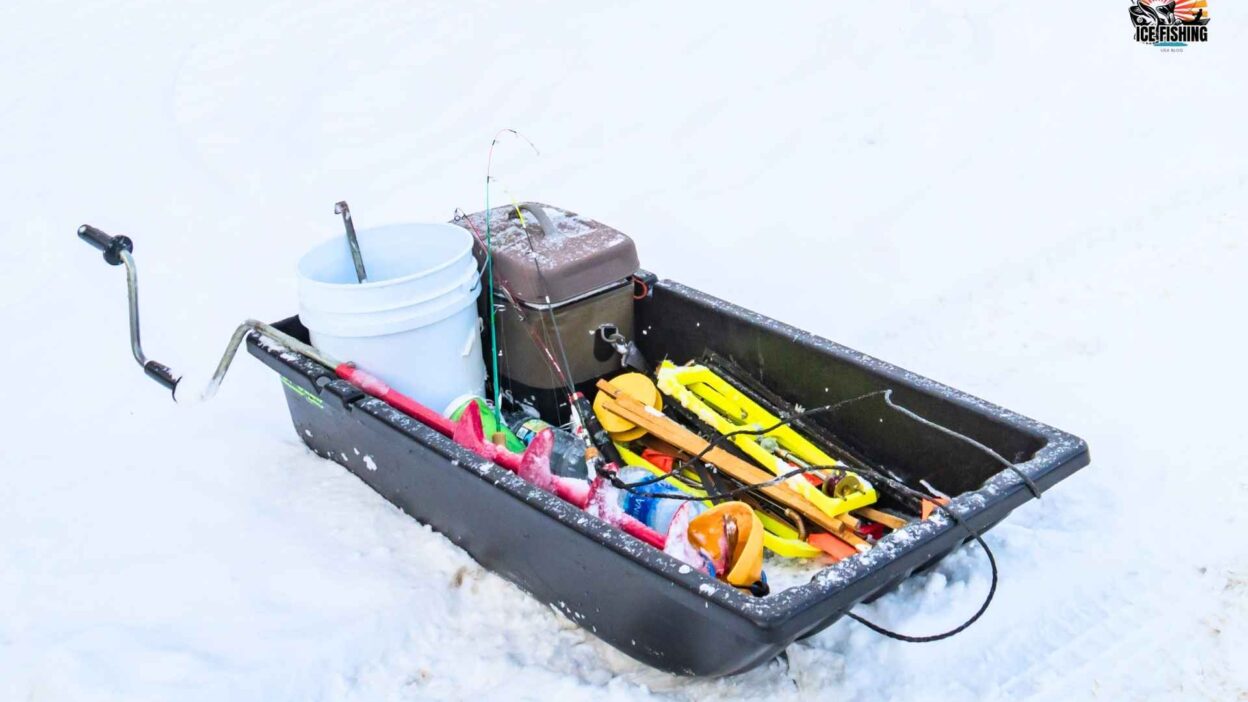
Dragging a standard plastic utility sled, often called a ‘Jet sled’, loaded with equipment can feel like pulling a snowplow, quickly draining energy and enthusiasm. This very real struggle is the birthplace of ingenuity, leading directly to one of ice fishing’s most celebrated DIY solutions: the Smitty Sled.
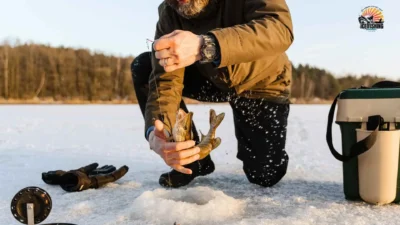
Many people are drawn to the frozen outdoors for ice fishing when the globe becomes white and the lakes are turned into a winter paradise. Nothing compares to the pleasure of companionship on the ice, the peaceful whisper of the wind, and the adrenaline of hauling in a catch. But you’ll need the correct equipment, like the reliable Smitty sled, to enjoy this snowy trip.
So, how can one construct a Smitty sled? It’s easy to transport your ice fishing equipment with this practical device. Imagine it as your movable throne on the ice, carrying your bait, poles, and maybe a hot chocolate thermos with you. Come along with me as we go into the process of building your own Smitty sled, along with helpful advice and a few inspirational quotes.
This guide is dedicated to exploring how to build a smitty sled, transforming that gear-hauling burden into a nearly effortless glide.
What is a Smitty Sled? The Genius DIY Solution
So, what exactly is this marvel of winter engineering? At its core, a Smitty Sled is a simple, yet brilliant, homemade ice sled designed specifically to make transporting heavy ice fishing gear across snow and ice significantly easier. Named after its popularizer within online ice fishing communities around 2009 , the concept involves mounting a pair of old skis (downhill or cross-country) to a raised frame, typically made of wood or sometimes PVC or metal. The angler’s existing gear hauler – often a standard plastic tub like a ‘Jet sled’ or the base of a ‘flip over’ ice shelter – is then placed on top of this raised frame.
The purpose is elegantly simple: elevate the bulky sled tub above the snow and utilize the gliding properties of the skis. This design dramatically reduces the effort required for pulling compared to dragging the tub directly on the snow or ice. It’s a common sight in dedicated ice fishing circles, often referred to simply as a ‘fishing smitty’, and stands as a testament to angler innovation. Learning how to build a smitty sled empowers anglers to overcome a major physical hurdle of the sport.
Why Build a Smitty Sled? The Undeniable Advantages
The popularity of the Smitty Sled isn’t just hype; it’s rooted in tangible benefits that transform the ice fishing experience, especially for those who travel on foot. Understanding how to build a smitty sled unlocks several key advantages over traditional methods:
- (A) Effortless Hauling: This is the primary and most celebrated benefit. Anglers consistently report a massive reduction in pulling effort, often described as cutting the required force by half or even more. Loads exceeding 200 lbs can feel almost effortless to pull, even through deep snow, compared to the exhausting struggle of dragging a standard sled without the Smitty modification. One test even showed waxing the skis could cut pulling resistance by half again. This ease of transport makes longer treks and hole-hopping feasible without undue fatigue. The difference is so profound that many wonder why they ever hauled gear without one.
- (B) Conquering Deep Snow: Standard plastic sleds, like the common ‘Jet sled’ or even basic snow sled types, tend to “plow” through deep snow, accumulating snow in front and creating immense resistance. The Smitty Sled design elegantly solves this. By elevating the main sled tub several inches off the surface (often 6-8 inches or more ), it prevents the tub from acting like a bulldozer. The narrow skis cut through the snow efficiently, minimizing the plowing effect and allowing much smoother travel even in significant accumulations. While some might initially think wider surfaces float better, a heavy, loaded sled inevitably sinks; the Smitty’s skis require less energy to move forward as they displace a much smaller volume of snow.
- (C) Protecting Your Gear: Elevating the main sled tub keeps it out of slush and deep snow, helping to keep gear drier and cleaner. This is particularly beneficial for sensitive items like electronics or the fabric of an ice shanty or ice shelter.
- (D) DIY Satisfaction and Customization: Building your own gear offers a unique sense of accomplishment. The Smitty Sled is a relatively simple project accessible to those with basic woodworking skills. Furthermore, the basic design is endlessly customizable. Anglers frequently modify their Smitty Sleds to include rod holders, auger mounts, seats, lights, and more, creating personalized mobile fishing stations. Learning how to build a smitty sled is just the beginning; making it your own is part of the fun.
- (E) Cost-Effectiveness: Compared to purchasing specialized, heavy-duty commercial ice fishing sled systems, a homemade ice sled like the Smitty can be built very affordably, especially if using repurposed materials like old skis found at garage sales or thrift stores. Basic builds can cost as little as $15-$50.
The Smitty Sled isn’t just a piece of equipment; it’s an enabler. It extends range, conserves energy, encourages mobility, and makes the entire process of getting onto the ice and setting up significantly more enjoyable. It directly addresses the physical “pain point” of gear transport, allowing anglers to focus more on the fishing itself. This practical problem-solving is why understanding how to build a smitty sled is such valuable knowledge for any serious ice angler.
👉Related Post: Ice Fishing Sled Cover: The Ultimate Guide for Enthusiasts
Gathering Your Supplies: Materials and Tools for the Build
Embarking on the journey of learning how to build a smitty sled starts with gathering the right materials and tools. Fortunately, a basic Smitty doesn’t require exotic components. Here’s a breakdown of what is typically needed:
- (A) The Foundation: Skis: The heart of the Smitty Sled.
- Types: Both downhill (alpine) and cross-country (Nordic) skis are commonly used. Downhill skis are often wider and may offer better flotation in powder, potentially being more durable. Cross-country skis are narrower, lighter, and some find they cut through deep snow better and maneuver more easily. Ultimately, either type works well.
- Source: Used skis are the way to go! Check thrift stores, garage sales, online marketplaces (like Facebook Marketplace), or ask friends and family. Look for skis that are roughly the length of the sled tub you intend to carry. Remove any bindings before starting.
- (B) The Structure: Frame Materials: This supports the main sled tub.
- Wood: The most common choice due to cost and ease of use. Standard dimensional lumber like 2x4s, 2x6s, or even 2x10s are frequently used for the upright supports (risers). 1x4s or 2x4s are often used for the horizontal cross members. Cedar fence boards have also been used.
- PVC Pipe: An alternative for a lighter frame, though it can become brittle and potentially break in very cold temperatures. Easier to cut and assemble than wood for some.
- Metal: Aluminum (square tubing, angle iron) or steel (square tubing) offers maximum durability, especially for collapsible designs or heavy loads, but requires metalworking tools and skills.
- (C) Putting It Together: Fasteners:
- Screws: Essential for wood construction. Use corrosion-resistant screws suitable for outdoor use, such as coated deck screws. Common sizes mentioned include #14×2″ and 3.5″ screws. Lag screws (e.g., 4″) provide heavy-duty connections. Crucial Tip: Using weatherproof screws is vital to prevent rust and failure over time in wet, slushy, and potentially salty conditions.
- Bolts, Nuts, Washers: Often used for attaching skis (especially carriage bolts ), connecting metal components, or creating removable joints. Common sizes include 1/4″ UNC bolts with nylon locking nuts and washers. Wingnuts can be used for tool-free disassembly.
- Other Hardware: Eye bolts are excellent for attaching pull ropes securely. U-bolts can be used for mounting legs to sled tubs in collapsible designs. D-ring locking pins allow for quick removal of cross members.
- Countersinking: Ensure screw or bolt heads attaching the skis sit flush with or below the ski base to minimize drag.
- (D) Essential Tools:
- Basic Woodworking Tools: Saw (hand saw, circular saw, or miter saw), drill (with various bit sizes, including pilot bits and potentially a countersink bit ), measuring tape, marker or pencil.
- Jigsaw: Very helpful for cutting notches in wooden risers for stronger joints.
- Wrenches/Screwdrivers: For tightening bolts, nuts, and screws.
- Metalworking Tools (if applicable): Metal-cutting saw (like a band saw), drill press, grinder might be needed for metal frames.
- (E) Optional Materials:
- Traction Tape: Can be applied to cross members to help prevent the ‘Jet sled’ tub from sliding if not bolted down.
- Rope: A sturdy, comfortable rope for pulling. Ensure it’s long enough (8 feet or more recommended) to walk comfortably ahead of the sled.
- Straps: Cam straps or ratchet straps are needed to securely fasten the ‘Jet Sled’ or flip over base to the Smitty frame.
- Wood Glue: Can add extra strength to wood joints.
- Paint/Sealant: Protects wooden components from moisture and adds a custom look.
The choice of materials involves balancing cost, weight, durability, and the builder’s skill level and available tools. Wood offers accessibility, PVC provides lightness but potential fragility in extreme cold, while metal delivers strength at a higher complexity and cost. Selecting the right skis and frame material is a key first step in understanding how to build a smitty sled that best suits individual needs and conditions.
The Classic Build: Step-by-Step Instructions on How to Build a Smitty Sled
Now for the exciting part – actually building your homemade ice sled! This section details how to build a smitty sled using the classic wooden frame design, a popular and accessible starting point. This approach typically uses dimensional lumber like 2x4s or 2x6s for the risers and cross members.
- (A) Design Overview: Imagine two pairs of short, upright wooden posts (risers) standing on the skis. These pairs are connected horizontally by two cross members. Your ‘Jet sled’ or gear tub will rest on these cross members. The goal is simple elevation and stability.
- (B) Preparation is Key: Before making any cuts, double-check all measurements. Lay out the skis and wood pieces to visualize the final assembly. Ensure the skis are clean and free of old bindings. Accuracy now prevents headaches later.
- (C) Step 1: Cut the Risers: Determine the desired height. A common range is 6-8 inches for good snow clearance. Cut four identical pieces of wood (e.g., 2x6s) to this length. Alternatively, some designs use slightly longer front risers cut at a 45-degree angle on top for aesthetics or rope attachment. For instance, cut two 2x4s at 6″ and two at 7.5″, angling the 7.5″ pieces so their top flat surface is 6″ long.
- (D) Step 2: Prepare for Cross Members (The Crucial Notch): This step significantly enhances strength. Instead of just screwing cross members onto the face of the risers, cut a notch (also called a dado) into the top or side of each riser where the cross member will sit. A jigsaw is useful here. The notch should be the width and depth of your cross member material (e.g., if using 1×4 cross members, cut a notch approx. 3/4″ deep and 3.5″ wide). Why is this critical? The notch allows the wood of the riser to directly support the weight carried by the cross member, transferring the load through the wood itself, rather than relying solely on the shear strength of the screws. Builds that skip this step are far more prone to breaking under load. This technique is fundamental to knowing how to build a smitty sled that lasts.
- (E) Step 3: Cut and Attach Cross Members: Cut two cross members to the desired width. This width should accommodate your ‘Jet sled’ or ice shanty base (e.g., 25″ for a 30″ wide sled , or 32″ ). Apply wood glue in the notches for extra rigidity, then fit the cross members into the notches on the risers. Secure them firmly using weatherproof screws , drilling pilot holes first to prevent splitting. Ensure the resulting frame (two riser pairs connected by cross members) is square and stable.
- (F) Step 4: Prepare and Attach the Skis: Place the assembled frames onto the skis in their desired positions (often spread apart to support the length of the sled tub ). Mark where the fasteners will go through the skis into the bottom of the risers. Drill pilot holes through the skis. Crucial Tip: Use a countersink bit or a larger drill bit to create a recess around each hole on the bottom of the ski base. This allows the screw or bolt heads (like carriage bolts ) to sit flush or slightly recessed, preventing them from snagging on ice or snow and increasing drag. Attach the skis securely to the risers using appropriate weatherproof screws or bolts. Double-check that the skis are parallel to each other.
- (G) Step 5: Add the Pull Rope: Securely attach a sturdy pull rope. Crucial Tip: Attach the rope low down, either directly to the tips of the skis (if they have holes) or to the bottom part of the front risers using strong eye bolts. Avoid attaching the rope high up on the frame or the sled tub itself. Why? Pulling from a low point helps lift the front tips of the skis slightly, allowing them to ride over snow rather than digging in. Pulling from high up creates a downward force that works against you. Ensure the rope is comfortable to hold and sufficiently long (8-12 feet is common).
- (H) Step 6: Finishing Touches: Sand any rough edges on the wood to prevent splinters. Apply a coat of paint or sealant to protect the wood from moisture, extending the life of your fishing smitty. Consider adding traction tape to the top of the cross members to help grip the bottom of your ‘Jet sled’. Finally, place your sled tub onto the frame and determine the best way to secure it using ratchet straps or cam straps, often looped around the cross members or through added eyelets.
- (I) Visual Aids: Following diagrams or photos during construction can be immensely helpful. Many online resources and videos demonstrate variations on how to build a smitty sled.
Remember, precision in cutting notches and properly countersinking fasteners are not just details; they are key elements that contribute significantly to the sled’s durability and smooth performance on the ice. Mastering these steps is central to successfully learning how to build a smitty sled.
Beyond the Basics: Collapsible Smitty Sleds and Custom Mods
While the classic wooden Smitty Sled is a fantastic starting point, the DIY spirit of the ice fishing community hasn’t stopped there. Practical needs and creative minds have led to numerous variations, most notably the ‘collapsible smitty’. Understanding how to build a smitty sled today often involves considering these more advanced, space-saving designs.
- (A) The Need for Compactness: Enter the Collapsible Smitty: The main drawback of a fixed Smitty Sled is its bulk. Storing it in the off-season or transporting it, especially in smaller vehicles or under truck bed tonneau covers, can be challenging. The ‘collapsible smitty’ addresses this directly, offering designs that break down or fold for much easier handling and storage. This innovation is particularly valued by anglers using ‘flip over’ style shelters, as some collapsible designs allow the shelter tub to drop down closer to the ice, maintaining the original seat height and reducing wind gaps under the skirt.
- (B) Design Approach 1: Telescopic Legs (Metal Build): A sophisticated approach involves creating telescopic legs, usually from square aluminum tubing. Typically, a smaller tube (e.g., 1.5″ square) slides inside a larger one (e.g., 2″ square). A spring-loaded button or a locking pin mechanism secures the leg in the extended position for use and allows it to retract for storage. These legs are often mounted directly to the sides of the ‘Jet Sled’ tub using bolts and U-bolts. The skis are attached to the bottom of the inner, sliding tubes via angle brackets.
- Pros: Very strong (one design rated for 400+ lbs ), offers a significant height reduction when collapsed, can be designed to maintain the original ‘flip over’ ice shelter height , and avoids cross braces underneath that could snag in deep snow.
- Cons: Requires sourcing specific metal tubing and hardware, necessitates accurate metal cutting and drilling, potentially more expensive, and may be beyond basic DIY skills. This represents an advanced guide on how to build a smitty sled.
(C) Design Approach 2: Hinged Risers (Wood/Metal): Another method uses heavy-duty hinges, sometimes repurposed from coffee table lift mechanisms , attached to the risers (wood or metal) and the ski base or a bottom frame piece. This allows the risers and the attached cross members to fold down flat onto the skis.
- Pros: Conceptually simpler than telescoping legs, potentially adaptable to wood construction.
- Cons: The hinges themselves can have weight limitations and may be susceptible to bending or breaking under heavy side loads, such as turning sharply in deep snow. Ensuring a rigid lock in the upright position can also add complexity.
(D) Design Approach 3: Removable Cross Members (Wood Build): Perhaps the simplest collapsible approach involves designing the wooden cross members to be easily detachable from the risers or the ski assemblies. This is often achieved using locking pins (like D-ring pins ), wingnuts , or simple bolt arrangements. The sled breaks down into flatter components (ski/riser assemblies and separate cross members).
- Pros: Relatively easy to implement with basic woodworking skills and common hardware, uses readily available materials.
- Cons: Requires reassembly each time, might be slightly less rigid than fixed or hinged designs, components are separate pieces rather than a single folding unit.
(E) Other Customizations & Ideas: The Smitty Sled is a platform for endless innovation:
- Wheels: Adding small wheels (like bicycle training wheels) to the frame allows the sled to be rolled across pavement, gravel, or bare ground before hitting the snow or ice, saving wear on the skis.
- PVC Builds: As mentioned, PVC pipes offer a lightweight frame alternative, often using standard fittings for assembly.
- Ladder Stabilizers: Pre-fabricated aluminum ladder stabilizers can serve as strong, lightweight, and easily removable cross members.
- Direct Gear Mounting: Some anglers forgo the ‘Jet Sled’ tub entirely, designing their Smitty frame with enough cross members and attachment points to strap gear like buckets, augers, and shelters directly to the frame.
- Accessory Mounts: The frame provides ample opportunity to add custom mounts for augers , rod holders or rod boxes , bait buckets , propane tanks and heaters , seating , tool holders , battery boxes for electronics , fish finders , and even LED lights for early morning or late evening treks.
The evolution towards the ‘collapsible smitty’ highlights how practical needs – fitting gear under a tonneau cover, storing it in a crowded garage, or making it compatible with a specific ice shelter like a ‘flip over’ – drive innovation within the user community. Learning how to build a smitty sled involves choosing the design that best fits one’s transport, storage, and on-ice needs, whether it’s the classic fixed frame or a more complex collapsible version.
The Magic Carpet Ride: Unpacking the Physics of the Smitty Sled
Why does the Smitty Sled work so well? It feels almost magical how easily a heavy load glides across the snow. But the magic is actually clever physics. Understanding the science behind how to build a smitty sled reveals why it’s so effective.
- (A) Friction: The Invisible Enemy: Friction is the force that resists motion when two surfaces rub against each other. When dragging a heavy ‘Jet sled’ directly on snow or ice, friction constantly works against the puller, requiring significant energy to overcome.
- (B) Skis vs. Sled Bottom: Skis are specifically designed to minimize friction on snow and ice. They work by creating a microscopic layer of meltwater between the ski base and the snow. This happens because the pressure and friction from the ski generate heat, melting the tiny contact points (called asperities) on the snow crystals. This ultra-thin water layer acts like a lubricant, allowing the ski to glide much more easily than a broad, potentially rougher plastic sled bottom. While the narrow ski has less surface area in contact with the snow compared to a wide sled tub, reducing the overall friction force, the key is this lubrication effect and the optimized shape for gliding.
- (C) Beating the Plow: Perhaps even more significant, especially in deeper snow, is how the Smitty Sled eliminates the “snow plow effect”. A standard sled tub, when pulled through snow, has to physically push snow out of the way, like a miniature bulldozer. This displacement of snow requires a tremendous amount of energy, often far more than overcoming simple sliding friction. By lifting the bulky tub completely off the snow surface, the Smitty Sled ensures that only the narrow skis are interacting with the snow, drastically reducing this plowing resistance. This is why the improvement feels most dramatic in snowy conditions. The Smitty Sled tackles two distinct physical challenges at once: reducing sliding friction via the skis and eliminating displacement resistance by lifting the load above the snow. This dual action is why the perceived effort reduction is so substantial compared to just trying to make a standard sled slide better (e.g., by waxing it ).
- (D) Snow Science Snippets: The type of snow matters. Cold, fresh powder crystals can be sharp and “aggressive,” creating more friction initially. Wet, slushy snow can be “grabby” due to increased capillary drag (water tension sticking to the ski). Hard, refrozen snow (corn snow or ice) is often very fast with low friction. Skis interact with the snow’s microscopic texture (asperities), gradually smoothing them with repeated passes, which can also reduce friction over time.
- (E) Pulling Angle Matters: As mentioned in the construction steps, the point where the pull rope attaches is important. Pulling from a low point on the front risers or ski tips helps to slightly lift the front of the skis, preventing them from digging into the snow, especially when starting or encountering resistance. This relates to the direction of forces – a low pull angle encourages upward lift at the front.
- (F) Wax On, Wax Off? Just like for skiing, applying ski wax to the Smitty Sled’s skis can further reduce friction, particularly in certain snow conditions. Some anglers even wax the bottom of their plastic ‘Jet sled’ tubs. One informal test using a scale showed that applying a spray-on ski wax reduced the pulling force needed to move a loaded sled by roughly half. While perhaps not essential, waxing can provide an extra edge in glide performance.
Understanding these principles clarifies that the Smitty Sled isn’t just a random collection of parts; it’s a well-reasoned solution leveraging basic physics to overcome the specific challenges of moving heavy loads over snow and ice. This knowledge enhances the appreciation for the design when learning how to build a smitty sled.
The Big Chill: Ice Fishing Trends & The Smitty’s Role (2020-2024)
The Smitty Sled exists within the broader context of ice fishing trends. Participation rates, gear advancements, and angler demographics all influence the relevance and adoption of such DIY solutions. Examining data from recent years (2020-2024) provides valuable context.
- (A) Ice Fishing Participation Landscape:
- United States: Recreational fishing overall saw significant activity. In 2023, a record 57.7 million Americans (age 6+) fished, representing a 19% participation rate, surpassing even the peaks seen during the 2020 pandemic shutdowns. This followed growth in 2022 (54.5 million anglers, 18% rate) over 2021. However, there’s a notable “leaky bucket” phenomenon, with millions starting or returning to fishing each year, but millions also lapsing out. Key growth areas include Hispanic anglers (participation nearly doubled in a decade) and female anglers (reaching a record 21.3 million in 2023). While participation among young children (6-12) dipped slightly after 2020, teen (13-17) participation saw a strong increase in 2023. Fishing remains a social activity, with most participating in small groups. Critically, 87% of current anglers started fishing before age 12, highlighting the importance of early introduction. While these figures cover all fishing, the overall health and growth of the sport suggest a strong base for specialized activities like ice fishing.
- Canada (Ontario Focus): The picture in Ontario during this period was heavily influenced by the COVID-19 pandemic. Overall angler numbers and days fished declined in 2020 compared to the previous survey in 2015, primarily because non-resident angler licence sales plummeted by 89% between 2019 and 2020 due to travel restrictions. Conversely, Ontario resident participation saw a boost, with licence sales increasing by 7% from 2019 to 2020, leading to more days fished by locals. For the surveyed anglers (excluding non-residents and youth), ice fishing accounted for approximately 13% of their total fishing days (1.8 million ice days out of 13.6 million total days). This indicates that while perhaps a smaller portion of the overall fishing effort compared to open water, ice fishing remains a significant activity for resident Canadian anglers.
- (B) The Gear Boom: The market for ice fishing equipment has seen growth, driven by the sport’s popularity, technological advancements (like improved fish finders with CHIRP sonar), and a general increase in spending on outdoor recreation. Innovations in gear, such as lighter augers, better insulated pop-up ice shelters, and sophisticated electronics, enhance the experience but also add to the amount (and value) of gear anglers need to transport. However, the high cost of some advanced technology can be a barrier for some anglers.
- (C) Connecting Trends to the Smitty Sled: These trends reinforce the value proposition of the Smitty Sled.
- Increased resident participation (like in Ontario) means more local anglers facing the gear-hauling challenge without relying on vehicle access directly onto the ice.
- The growth in gear sales translates to anglers owning more equipment, making an efficient transport solution like a ‘fishing smitty’ increasingly necessary. Hauling gear for multiple people, given the social nature of fishing, further amplifies this need.
- The rising cost of some commercial gear might encourage more anglers to explore cost-effective DIY solutions like building a homemade ice sled.
- The significant “churn” rate in fishing participation suggests that reducing barriers and friction points is crucial for retention. If the difficulty of hauling gear contributes to anglers dropping out, a solution like the Smitty Sled, which dramatically eases this burden , could potentially help keep people engaged in the sport by making it more accessible and less physically demanding. Learning how to build a smitty sled can be an investment in continued enjoyment of the activity.
- (D) Table: Recreational Fishing Participation Snapshot (USA & Ontario Focus, 2020-2023)
| Year | Region / Metric | Value / Trend | Source Snippet(s) |
| 2020 | USA – Total Anglers (6+) | ~50-55M (Peak during COVID) | |
| 2020 | Ontario – Non-Resident Licence Sales | Declined 89% (vs 2019) | |
| 2020 | Ontario – Resident Licence Sales | Increased 7% (vs 2019) | |
| 2020 | Ontario – Ice Fishing Days (% Total) | ~13% of sampled resident/senior/other Cdn days | |
| 2022 | USA – Total Anglers (6+) | 54.5 Million (18% participation, up from 2021) | |
| 2022 | USA – Female Anglers | 19.8 Million (near record high) | |
| 2023 | USA – Total Anglers (6+) | 57.7 Million (19% participation, new record high) | |
| 2023 | USA – Female Anglers | 21.3 Million (new record high) | |
| 2023 | USA – Hispanic Anglers | 6.3 Million (participation nearly doubled in 10yrs) | |
| 2023 | USA – Angler Churn | +3.2M net gain; 15.4M new/returning, 12.3M lapsed |
(Note: Direct year-over-year ice-fishing specific participation data is limited in the provided sources. Table focuses on overall fishing trends and Ontario specifics where available.)
This data underscores that recreational fishing, including its winter component, is a major activity engaging millions. The challenges of gear transport are real for many participants, making the Smitty Sled a relevant and valuable project for anglers seeking to enhance their time on the ice. Understanding how to build a smitty sled offers a practical solution within this dynamic landscape.
Your Questions Answered: Top 5 FAQs on How to Build a Smitty Sled
Embarking on a DIY project like this naturally sparks questions. Here are answers to some of the most frequently asked questions encountered by those learning how to build a smitty sled, based on community discussions and build guides:
- (A) FAQ 1: What are the best skis to use for a Smitty Sled?
- Answer: There’s no single “best” type, as both downhill (alpine) and cross-country (Nordic) skis work well. Downhill skis are typically wider, potentially offering better float in powder snow and might be more robust. Cross-country skis are narrower and lighter, which some users feel allows them to cut through deep snow more effectively and maneuver more easily. The best source is usually used skis from thrift stores, garage sales, or online marketplaces, making cost and availability often the deciding factors. Choose whichever type you can find affordably; both will provide a dramatic improvement over dragging a tub directly.
- (B) FAQ 2: How high should the risers be? (How much lift is needed?)
- Answer: Riser height determines how high your sled tub sits above the skis. The main goal is sufficient clearance to prevent the tub from dragging in the snow. A common recommendation is a minimum lift of 6 inches, with 8 inches often preferred for better performance in deeper snow. Some builds use even taller risers (e.g., using 2x10s results in about 9.5 inches of riser height ). However, excessively high risers could potentially make the sled feel less stable, especially on uneven ice or slopes. Consider the typical snow depth you encounter. For ‘collapsible smitty’ designs intended for use with ‘flip over’ shelters, the extended height needs careful planning if the goal is to have the shelter tub rest near the ice when collapsed. When figuring out how to build a smitty sled, riser height is a key design choice affecting performance.
- (C) FAQ 3: Can I make a Smitty Sled that collapses or breaks down for transport/storage?
- Answer: Absolutely! This is a very popular modification. Many anglers build a ‘collapsible smitty’ to solve the problem of fitting the sled into cars, truck beds (especially under tonneau covers), or storing it compactly. There are several common approaches:
- Telescopic Legs: Using sliding metal tubes (usually aluminum) with locking pins.
- Hinged Risers: Attaching wooden or metal risers with heavy-duty hinges so they fold down.
- Removable Cross Members: Designing the horizontal supports to detach easily from the ski/riser assemblies using pins or bolts. Section VI of this guide explores these collapsible designs in more detail. Knowing how to build a smitty sled that collapses adds significant practicality for many users.
- Answer: Absolutely! This is a very popular modification. Many anglers build a ‘collapsible smitty’ to solve the problem of fitting the sled into cars, truck beds (especially under tonneau covers), or storing it compactly. There are several common approaches:
(D) FAQ 4: What are the essential materials and how much does it cost to build?
- Answer: The core components are: a pair of skis, material for the frame (wood, PVC, or metal), appropriate fasteners (screws, bolts), and a pull rope. The cost can vary significantly. If you find free or very cheap used skis and use scrap lumber, a basic wooden Smitty Sled can be incredibly inexpensive – potentially in the $15-$50 range. If you need to buy lumber, new skis, or opt for metal components and specialized hardware for a ‘collapsible smitty’, the cost will increase accordingly. However, even a more elaborate DIY build is often considerably cheaper than high-end commercial ice fishing sled systems. Part of learning how to build a smitty sled is resourcefulness in sourcing materials.
- (E) FAQ 5: Do I need special tools to build a Smitty Sled?
- Answer: For a standard wooden Smitty Sled, basic woodworking tools are usually sufficient: a saw to cut the lumber, a drill for pilot holes and driving screws, a measuring tape, and a marker. A jigsaw is highly recommended for cutting the strength-enhancing notches in the risers. If you plan to build with metal or create a complex ‘collapsible smitty’ with telescopic legs, you might need metal cutting tools, a drill press, or other more specialized equipment. However, a very functional and effective Smitty Sled is well within reach for anyone comfortable with basic DIY tasks. Don’t let a lack of advanced tools deter you from learning how to build a smitty sled using simple wood construction.
Addressing these common questions should provide clarity and confidence as you plan your own Smitty Sled project. Remember, the ice fishing community is known for sharing knowledge, so online forums and videos are great resources if you encounter specific challenges during your build.
Pimp My Sled: Customizing Your Smitty for Peak Performance & Style
Completing the basic structure is a major milestone in learning how to build a smitty sled, but for many anglers, it’s just the beginning. The true beauty of the homemade ice sled lies in its potential for customization. Think of the Smitty frame as a blank canvas, ready to be adapted to your specific gear, fishing style, and personal flair.
- (A) Beyond the Basics: The standard Smitty solves the hauling problem, but custom modifications can elevate it from a simple transporter to a fully integrated mobile fishing command center. Personalizing your sled makes it uniquely yours and optimizes your workflow on the ice.
- (B) Functional Mods Showcase: The possibilities are vast, limited only by imagination and practicality. Here are some popular functional upgrades seen in the community:
- Auger Mounts: Securely carrying the ice auger is a top priority. Common solutions involve U-bolts, specialized brackets, or custom-built holders attached to the frame or risers.
- Rod Holders/Boxes: Keep fishing rods safe and accessible with vertical tube holders, horizontal racks, or even fully enclosed rod boxes mounted to the sled.
- Bucket Holders: Dedicated spots for bait buckets or gear buckets prevent them from sliding around.
- Heater/Propane Tank Mounts: Securely fastening a portable heater and its propane tank is crucial for comfort and safety.
- Built-in Seating: Some designs incorporate a folding seat directly onto the Smitty frame, perfect for hole-hopping without needing a separate chair.
- Tool Holders: Keep essential tools like pliers, line cutters, and ice scoops within easy reach using simple clips or holders.
- Electronics Integration: Mounts for fish finders/sonar units, GPS devices, and dedicated battery boxes to power electronics are common additions.
- Lighting: Adding LED light strips, powered by a small battery, illuminates the sled and surrounding area for pre-dawn starts or fishing after dusk.
- (C) Aesthetic Mods: Function is key, but style matters too! Custom paint jobs can protect the wood and add personality. Decals, stickers, or unique structural designs can make your fishing smitty stand out on the ice.
- (D) Inspiration Gallery: Need ideas? Look online! Platforms like Pinterest , YouTube , and ice fishing forums (like Reddit’s r/IceFishing or IceShanty.com ) are treasure troves of Smitty Sled photos and videos showcasing incredible creativity and diverse modifications. Seeing what others have done is a great way to spark ideas for your own build.
- (E) Share Your Build: Once you’ve completed and customized your Smitty Sled, share it with the community! Post pictures or videos online. The collaborative spirit is strong among ice anglers, and sharing your take on how to build a smitty sled can inspire others.
These customizations demonstrate a deeper level of engagement with the sport. They aren’t just about making the sled look cool; they are practical adaptations designed to improve organization , efficiency (“get down right away versus unpacking gear” ), and overall comfort during a day of ice fishing. Building and modifying a Smitty Sled becomes an extension of the fishing experience itself.
Conclusion: Your Sled, Your Ice, Your Adventure
The journey across the ice, once a potential source of strain and exhaustion, can be transformed. We’ve explored the challenge of hauling cumbersome gear – the augers, the ice shanty, the myriad of essentials – and discovered the elegant, community-born solution: the Smitty Sled. This guide has walked through the process, from understanding its core principles to gathering materials and, finally, the rewarding steps of how to build a smitty sled.
The benefits are clear: dramatically reduced pulling effort, the ability to conquer deep snow that would stop a standard snow sled in its tracks, and a platform ripe for personalization. Whether opting for a classic wooden build, easily achievable with basic tools , or tackling a more advanced ‘collapsible smitty’ for ultimate convenience , the result is the same – more energy saved, more mobility gained, and more focus available for the pursuit of fish beneath the frozen surface.
There’s a unique satisfaction that comes from using equipment crafted by one’s own hands. Building a Smitty Sled connects the angler not only to their gear but also to the spirit of ingenuity and self-sufficiency that thrives in the outdoor and DIY communities. It’s a testament to the idea that challenges can be met with creativity and readily available materials. The enthusiastic reports from anglers who have built their own – “Pulls like a dream!” , “It’s a million times easier!” , “You need to build one!” – speak volumes about the project’s value. This feeling of accomplishment, of having created a practical tool that enhances the enjoyment of a passion, is perhaps as rewarding as the effortless glide across the ice itself.
So, consider this an invitation. Gather those old skis, dust off the toolbox, and embark on the project. Learning how to build a smitty sled is more than just a construction task; it’s an investment in future adventures, making every trip onto the hardwater smoother, easier, and ultimately, more enjoyable. May your build be sturdy, your pulls be light, and your lines be tight. The ice awaits.